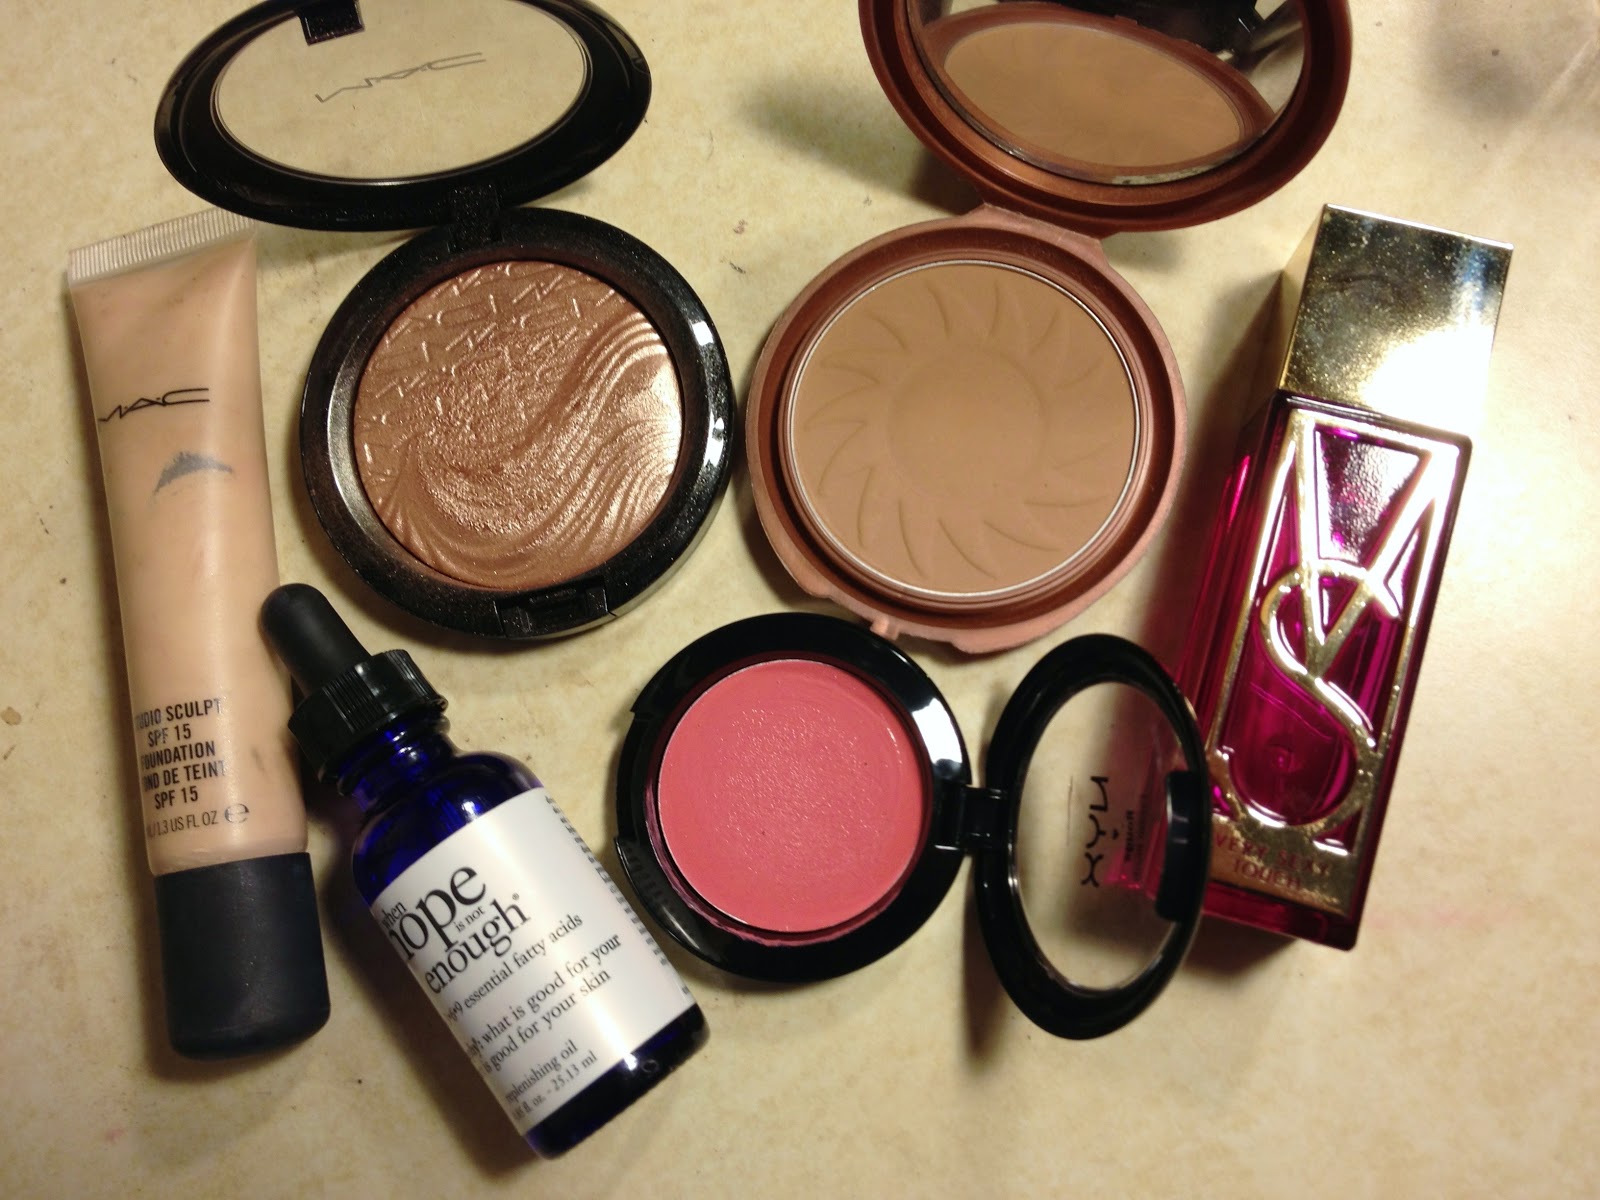
Tuesday, December 11, 2012

Review: Benefit "Fine One One"

I thought it was only appropriate to share this review on the official launch date of the newest member of the Benefit family, “Fine One One” this sleek- looking gadget is a blush and lip color in one…or should I say, three. Benefit is always good for multi-tasking products! Here’s how they describe Fine One One…
 

This sheer brightening cheek and lip trio – pink champagne, sheer watermelon and soft coral – blends together perfectly to give your look instant lift, shape and pop.”


The Design:

Let’s be honest, Benefit knows how to do cute packaging and this one is no different. A slim, metallic blush colored packaging with the name in fancy bold print makes it very eye-catching. And I like how the box states what the product is for the top since the name doesn’t give away the product’s use. The case of the product is even cuter with the same metallic blush color as the box and is so sleek and discreet looking! I think that may be the point as they say on the box “revive your cheeks and lips…Stat!” by that meaning, perfect for beauty on the go and the size makes it really easy to squeeze into the purse makeup bag. Another feature I admire is the twist up applicator (similar to a deodorant bottle design). No need for a brush here, just twist up, swipe and blend with fingertips – very convenient for a quick touch up.

The Product:

As I opened the product, I wasn’t expecting a little striped trio of colors. The coral, watermelon and pink champagne colors may look at tad alarming (bright!) to some, but it will definitely give that pop of color if you feel your skin is looking lackluster. As far as application goes, they say to “glide from the apple of your cheek to your temple then blend with fingertips in an upward circular motion”. Not knowing any better, I did exactly what I read and ended up with waaaay too much color on my face. Keep in mind that I have fair skin, so it was extremely visible on me. After playing around with it, I decided that best way to put it on was to place on the apple of my cheek then kind of do a half-swipe up towards my temples, keeping a very light hand with it. Another way is to do a few light dots going in the same up and back motion - all while still blending with my fingertips; that part didn’t change. I think the peachy/pinky/glow-y combo is very flattering and where chosen because they are versatile and work well with many skin tones. The texture is very soft and velvety – sort of like a cream to powder. Or in Benefit perspective, it feels like Porefessional. I like the fact that it is neither too creamy nor powdery because again, it will work with many skin types – oily, dry etc. As far as using it on my lips, it gives a natural and sheer effect. If you want extra moisture, you might want to pop on some lip balm on top as the formula is exactly hydrating. Bonus for lips: you can swirl your finger or brush in all three colors or just dab in one or two for a custom color look. How fun?!

The Conclusion:

Fine One One definitely performs its duty as a quick and easy flush of color for cheeks and lips. The packaging is purse and travel friendly and bright colors blend out easily and can go from sheer to shocking. I like the idea of an on-the-go, multitasking product but I can’t help but feel like it might not be something everyone will be scrambling to get their hands on right away. The $30 price point (for.28 oz) may put a few people off, but loyal Benefit followers will definitely lust over it and will find a way to work it into their routine. And I have to say, I am the latter. I’ll do an update in a month or so and let you know how I’ve been working it into my routine!
Hope everyone has an amazing day!
Danielle xx

Thursday, December 6, 2012

Highlighter Obsessed


Is it just me or have the past few times I’ve posted it has been about glowing skin? I might have a slight obsession with radiance. Really, highlighter and blush can make skin look just as pretty, healthy and flawless as a full coverage foundation. With so many different formulas out there it can sometimes be overwhelming on what to choose. There are pressed and loose powders; liquid, gel and cream formulas…how do you know what is right for you? Powder highlighters are a little more subtle and are good for just a slight sheen on skin without taking away from the more satin or matte finish of the skin. The creamy and liquid highlighters give off a more noticeable glow and are a little more on the dewy side with a slight shine. It is all about preference here so choose what you are more comfortable with and what compliments your skin the most.  Some days I’ll reach for the creams when my skin is more dehydrated and dull, other days when I’m going for a softer, matte finish I will use my powders. Happy highlighting!

My favorite highlighters

1.       MAC Extradimension Skin Finish “Superb” (pressed powder)

2.       Smashbox Softlights “Pink Starburst” (pressed powder)

3.       Benefit “Watts Up” (cream to powder stick)

4.       Benefit “High Beam” (liquid-gel)

5.       Benefit “Girl Meets Pearl” (liquid-gel)

6.       Femme Couture Get Radiant Complexion Enhancer “Pearl” (liquid-gel)

7.       Bare Minerals “Clear Radiance”  (loose powder)


Danielle xx

Thursday, November 15, 2012

Winter Skin Saver


Remember when I talked about my “magical” skin care routine? Well since it’s gotten colder and my skin has become drier, I decided it was time to bring out from summer hibernation (and purchase a new one because I had very little leftovers from last year) my When Hope is Not Enough replenishing cream from Philosophy. I have been using this for the past 2 years every winter and it really is the ultimate for dehydrated skin. It is super rich, almost custard-like but it melts into my skin like a dream- never feels greasy or heavy. It has a slight herbal scent which I actually like, but it is not overpowering or irritating (for my skin at least). I’m still using the Philosophy replenishing oil at night but now I layer this on top for serious hydration to relieve my dry, tight-feeling skin. Bonus: it’s also antioxidant-rich to it helps protect my skin from free-radical attack (which damages skin just as much as UV rays).  And when I wake up in the morning my skin looks so glowy and feels velvety soft. Love. If you are in the market for a more intense winter moisturizer, definitely consider this.  
 
 
Danielle xo
p.s. winter skin savers part two coming soon :)
 

Monday, November 12, 2012

Angel Skin


It’s that time of the year. Victoria’s Secret is about to have their huge annual fashion show in a few weeks and women everywhere will be glued to the TV mesmerized by the models’ hair and makeup…or is that just me? Their skin looks so perfect and healthy and did I mention that glow?! Ugh. I know it’s a combination of professional makeup artists, good skin, lighting, the right products applied but c’mon don’t you want skin like that too? I had to figure out a way so I did a little mixology and this is what I came up with…

One (baby) drop of my Philosophy When Hope is Not Enough replenishing oil with a pea-sized blob of MAC Studio Sculpt. I mixed the two together on the back of my hand and applied it with a stippling brush on moisturized skin. Next, I used my NYX cream blush in Glow on the apples of my cheeks and up on my cheekbones to my hairline. On top of the blush, I lightly swept MAC Extra Dimension Skinfinish in Superb all over cream blush and cheekbones, bridge of my nose and cupids bow. And for the finishing touch, I dusted a light layer of NYC Sunny bronzer around my jawline, hairline, and hollows of my cheeks for some Angel bone structure. Done! Maybe I got a little carried away by adding the perfume (Very Sexy Touch), but what can I say? Having the look of Angel skin means smelling like one too, right? If you want to recreate the “Angel glow” at home, it doesn’t have to be these exact products. These are just what I already had, so feel free to experiment with what you’ve got.

After: Glowy and Angel-esque
(side note - I completely forgot to put on any mascara...whoops..)


Hope you all have a lovely day! Stay tuned for lots of new posts coming soon!

xo Danielle


Thursday, November 1, 2012

October Faves


Can’t believe October is over already! With another month passed, that means it’s time for a “favorites” post. I guess you could say I’ve been in a pampering mood for a while as one of my favorites for October was the “Dr. Teals Epsom Salt with Eucalyptus and Spearmint”. Perfect for a lazy day off or a relaxing nighttime soak. I’ve read that Epsom salt is good for softening your skin and had detoxifying properties, and it does the job well. Not so sure about how much it detoxes, but it certainly makes my skin extra soft. This will definitely be a staple for the rest of the cold months.
So basically after putting it off for literally years, I finally caved and purchased “Moroccan Oil” hair oil treatment. I had never tried it before my hair stylist used it last year, and every time I went for a trim I couldn’t wait to feel my soft and silky hair afterward. All you need is a small amount (think half dime-size for longer hair) applied to wet hair and that’s it! I don’t have to use any other styling product to gunk up hair and it really keeps my strands moisturized, never greasy. Let me tell you, if you have thought about purchasing this, go on and get it! This stuff is amazing and you won’t regret it.
Since the colder months are upon us, the change in weather has really taken a toll on my poor skin. Cold, dry outdoor air and dry indoor heat isn’t the best thing for anyone’s skin. My skin was starting to get more dry, breakouts peeking through and it was lacking some serious brightness. What better to reach for than my “Philosophy Microdelivery Purifying Peel”? I really haven’t been using this mask a whole lot the past 6 months but I found myself reaching for this once a week the whole month. It takes 1-3 minutes and the pineapple enzymes, Alpha Hydroxy Acid, and Lactic Acid work their magic and make my skin brighter and smoother.

My last favorite for the month is a little gem from L’Oreal called “Infallible Gel Lacquer Liner 24 hour”. Whew, that’s a long name but it’s amazing! It comes with a small precise brush similar to the shape of the Bobbi Brown liner brush. The liner glides on smooth with no tugging and comes out a nice opaque black on the first swipe, no need to layer here. Normally with long-wear or waterproof formulas, they tend to be very dry but not this one. It is creamy and when it sets, it does not budge ‘til I wash my face. If you are looking for a good quality gel liner but don’t want to spend too much, this is it.
 
What were your favorites for October?  Follow me on twitter @gorgeousguide1 and let me know!
xo Danielle

Friday, October 26, 2012

Coloring Your Hair at Home Like A Pro

Some of us may have been scarred for life from boxed hair dye.  I remember in junior high, I really wanted highlights so my mom suggested we do it at home. You know, the kind where you poke through the little holes in a shower cap-like contraption and pull out little slivers of hair? Oh how I was so young and naïve…

I ended up with some cool brassy highlights and my friends were not impressed. Skip forward to high school and college and even though I was more educated in the beauty realm I still didn’t know jack about hair color 101. “If it says ‘permanent’ then it must last longer in my hair” and my favorite “I don’t really need a color preserving shampoo”.  I don’t even want to talk about it.

Now, with a decade’s worth of mistakes, I consider myself a semi-pro at coloring my own hair (but by no means a trained professional) and have discovered a few tricks that take if from blah box to perfectly professional. 

Tip 1. If you have tried to color your hair and it ended up looking more like an unnatural wig…Try mixing 2 colors with the same undertone (e.i. cool, neutral or warm). Or you can mix either a cool or warm with a neutral. First, pick the color that you want your hair to be and then choose a slightly lighter/darker shade to tone it a bit (about 1 to 2 shades lighter/darker). The idea is that by mixing the two, you are getting a custom shade (like at the salon!) that will have a more natural/professional look because you are adding dimension and real-ness to your hair. No one’s hair is one flat color, so why dye your hair with just one color? The natural light and dark strands that everyone has will still take color slightly different; however the idea is that it won’t look as harsh.

Tip 2. You really do need a color preserving shampoo and conditioner. There were times where I didn’t want to change shampoo because I really liked what I had or I was just too lazy to go out and buy more. That was a bad idea. My color always faded dramatically in 2-3 weeks. It doesn’t matter what brand you get, just make sure it is intended for color preservation. A shampoo and conditioner that is sulfate- free is even better. By now, almost everyone knows about the ingredient Sodium Lauryl Sulfate and how it strips hair of its natural oils and also your hair color on dyed/highlighted hair. Finding the right shampoo/conditioner isn’t too difficult. There are so many sulfate-free brands out there that address almost every hair issue (frizz, breakage, dryness, lack of volume, etc.). Look at reviews and that can sort of give you an idea if it will work for you.

Tip 3. Unless you are covering gray hair or going from brunette to blonde, I suggest using a demi-permanent formula. Basically the kind that says “lasts 28 washes”. I know, that doesn’t sound like a long time, but when you think about only washing your hair 3 times a week, that’s 9 weeks of color survival. Even 4 times a week is still 7 whole weeks! Demi-permanent formulas are often ammonia-free, which means less hair damage and it will be fine to dye it again in a month and a half or so. Just be sure to do still do a weekly deep conditioning treatment.

Tip 4. Since we are mixing colors, I found it useful to use a little mixing bowl and brush applicator. I picked mine up at Sally’s for about $7 altogether.  Trying to fit twice the amount of dye in one bottle is going to be pretty difficult, so a larger open container works better. I use every last drop of both formulas (because my hair is kind of thick and longer) and mix it together in the bowl. If your hair is shoulder length or shorter just pour in half of each formula instead.
 
      My "professional" formula: Shampoo/Conditioner- L'Oreal EverSleek; Clairol Natural Instincts in "Dark Golden Brown" & "Dark Brown"; Mixing bowl and brush from Sally's.

Ok, so there are my very lengthy at home hair color tips! And remember, only go a shade or two lighter/darker…if you decide you want more than that, it might be a good idea to go to the salon since that can get a bit more tricky. For those of you who decide to go for it get ready for everyone to ask you where you get your hair done! Go on and tell ‘em! Or….it can be your little secret ;)

Xo Danielle

Tuesday, October 23, 2012

Review: L'Oreal EverCreme Cleansing Conditioner

This caught my eye a few different times on my many visits to Target. I finally decided to try it out (for only $6.99, I didn’t have much to lose). I had heard about cleansing conditioners before, but I never really had an interest in them until they became so easily accessible and inexpensive.  I’ve been on a hair kick lately, trying to get in back into smooth and soft mode instead of dry, damaged and frizzy mode. I also like to style my hair most days so instead of washing my hair every other day. It sort of extends the amount of time that I don’t have to shampoo it and I get the added benefit of being able to cleanse and style my second or third day hair without drying it out.
The description of the L’Oreal EverCreme Cleansing Conditioner is a “one-step product that is a gentle yet powerful product that is ¼ cleanser + ¾ moisture…Its low-lather cleansing reduces friction of the hair fiber to help minimize breakage…Triple action formula with Omega-3 and 6 leaves hair super soft without feeling weighed down” (www.ulta.com) (full description found here). Ok, review time…

left & center: bottle; right: one pump of L.E.C.C.
 
The Design:
It comes with a decent amount of product with 8.3 fl oz.  However my other L’Oreal shampoo and conditioner have 8.5. Not a huge difference but the number pumps I have to use for one time make its shower life significantly less. Speaking of the amount of product used, I found it quite difficult and almost time consuming that I had to pump 6-12 times for each “section” of hair I applied it when the bottle was wet and slippery. Since the bottle is a little awkward to hold on to, I had to prop it up on my knee for to make it pump out product quickly. Not too big of a deal I guess. I'm not sure if everyone will want to do that though.  The pump is a great idea, however it barely distributes any product because it only pushes down about a half inch to maybe an inch, therefore it hardly squeezes enough out to cleanse someone with a pixi haircut. My hair falls right at my chest and there is a lot of it. Note: the amount of productd used depends on hair length and thickness/density. Try out different amounts to know what is right for you. 

The Product:
This product definitely has a strong scent! I’m not quite sure what it is, but it’s sort of a heavy, warm, sweet, musky smell. I really didn’t mind the scent but, if you are very particular with smells or you are easily irritated by strong scents then this product may not be for you. After reading multiple reviews online about the best way to use this product, I found that by applying the “cleanseditioner” in sections (i.e. crown, sides, back/underneath, and ends) I was able to evenly distribute the product. I also scrubbed a little on my scalp to ensure cleanliness of hair and for my ends I just applied it the way I would with any regular conditioner.  Another review said that the longer your leave it in for, the more effective it is. So I did just that. I applied it first thing in the shower and let it soak while I continued with the rest of my shower routine and then I rinsed it out at the very end. One thing to note is that when rinsing, make sure to really scrub (and I mean scrub!) it out so that there is no remaining product in your hair. If there is, it will make your hair feel a little dirty when it’s dry…not what we are going for! I did not apply any additional hair products after I washed it because I wanted to see how well it would do on its own. My hair was really soft as it was air-drying (kind of felt like I had just used a deep conditioner) and after I blow-dried my hair, it was incredible how soft my hair was. The cleanseditioner definitely tackled the dryness in my hair. It was still a little poufy after the blow dry but still more smooth than if I had just used a regular shampoo/conditioner…plus that was with zero product added to my hair! And bonus: every time I use it, people compliment on how shiny and healthy my hair looks! Seriously, never thought I'd hear that. Woo!

Conclusion:
I think that the L’Oreal EverCreme Cleansing Conditioner delivers as promised and the fact that it is easily accessible and affordable gives it bonus points in my book. It is nice to have something to cleanse your hair knowing it isn’t stripping the moisture right out and it’s a quick(ish) one-step process. I'll probably purchase this again just for the fact that it extends my dirty hair life and I can still style it. And it lasts a fairly long time considering the amount I have to use each time (I only use it once or twice a week). If you have fine hair that tends to be more on the oily side, I would skip this one. However, if your hair is thick, dry/damaged and on the road to recovery, go ahead and give it a try!


xo Danielle